Mylar bags are a popular choice for packaging due to their durability and protective qualities. However, with so many products wrapped in Mylar on the shelves, how can you ensure that yours catches the consumer’s eye?
Beyond basic mylar printing, incorporating standout features can make your Mylar bags pop in a crowded retail environment.
Here are six advanced printing tips to elevate your Mylar bags from ordinary to extraordinary:
1. Metallic Foiling
Shine with Sophistication: Metallic foiling is a surefire way to attract attention. This technique adds a shiny, reflective surface to your mylar packaging, which not only looks luxurious but also catches light beautifully. Consider using metallic foiling for your brand name, logo, or other key graphics to make them stand out. Gold, silver, and copper tones are particularly eye-catching and can convey a sense of premium quality.
2. Inside Printing
Surprise and Delight: Inside printing offers a secondary visual experience when the customer opens the custom mylar bag. This can be a great way to reinforce brand messaging or provide additional artistic elements that enhance the unboxing experience. Whether it’s a vibrant pattern, a thank-you message, or care instructions, inside printing turns opening the product into an event, adding perceived value.
3. Custom Shaped Windows
Peek-a-Boo Features: Custom shaped windows allow customers to see what’s inside the bag without opening it, which can be a huge selling point. Tailor the shape of the window to match your brand or product theme. For example, if you’re selling organic snacks, a leaf-shaped window can underline the natural quality of your product. Thoughtfully designed windows not only showcase your product but also make the custom mylar packaging itself memorable.
4. UV Spot Gloss
Highlight with Elegance: UV spot gloss involves applying a shiny coating to specific areas of your custom Mylar bag. This selective glossing can highlight important elements like logos, product names, or special features. It adds texture and depth to your packaging, making the glossy areas stand out against a matte background. It’s an elegant way to draw attention to the aspects of your product that you most want to promote.
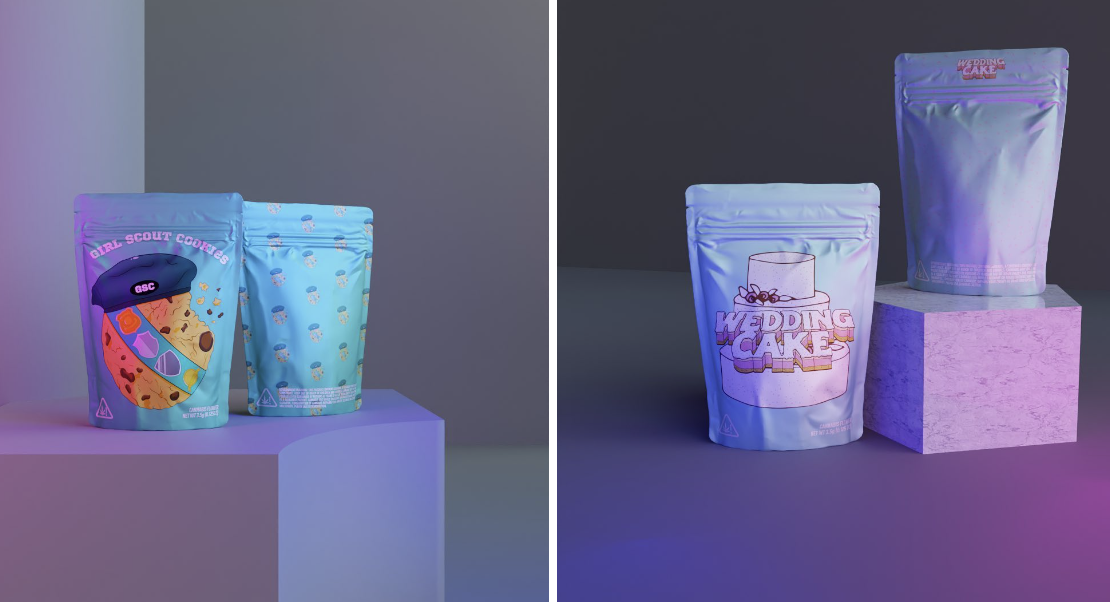
5. Holographic Finish
Captivate with Color: A holographic finish can make your printed Mylar bag sparkle with a spectrum of colors. This type of finish is particularly effective in attracting the attention of younger consumers and stands out brilliantly under retail lighting. It gives your packaging a dynamic appearance that changes depending on the viewing angle, ensuring that it catches the eye of potential customers from all directions.
6. Bottom Pouch Printing
Utilize Every Inch: Don’t neglect the bottom of the custom mylar bag. Printing on the bottom pouch can be a clever use of space, especially for products that might be placed in bins where the bottom may be more visible than the front. Use this area for additional branding, fun facts about the product, or even playful graphics. It’s a unique touch that can differentiate your product from competitors.
Implementing these advanced printing techniques can significantly enhance the visual appeal and effectiveness of your custom Mylar bag packaging. By adding these elements, you not only make your product stand out on the shelf but also create a more engaging experience for your customers. Each of these features adds a layer of sophistication and interaction, ensuring that your product isn’t just seen; it’s remembered.
The Dos of Mylar Printing
Printing on Mylar bags is both an art and a science. These resilient, glossy pouches serve as a pristine canvas for your branding but require specific know-how to ensure the final print is as striking as intended. Whether you’re looking to turn heads in the retail aisle or create memorable unboxing experiences, following these dos and don’ts will help you nail your Mylar bag designs every time.
1. Do Test Your Inks
Mylar’s unique surface can be tricky for inks. Always test your inks to ensure they adhere well and maintain their vibrancy over time. Opt for inks specifically formulated for use on synthetic surfaces like Mylar to avoid smudging or peeling.
2. Do Consider the Bag’s Texture
Mylar printing comes with different finishes, each impacting ink adherence and appearance. A glossy finish might enhance your colors’ vibrancy, while a matte finish could give a more understated, elegant look. Choose a texture that complements your design and enhances its overall appeal.
3. Do Use High-Resolution Artwork
High-resolution images are crucial for Mylar bag printing due to its slick surface. Low-resolution images can blur or pixelate, detracting from the professionalism of your packaging. Aim for artwork at 300 dpi or higher to ensure sharp, clear prints.
4. Do Think About the Environment
If sustainability is part of your brand ethos, show it in your printing choices. Use eco-friendly inks and recyclable Mylar options whenever possible. This not only appeals to environmentally conscious consumers but also aligns with global trends toward sustainability.
The Don’ts of Mylar Printing
1. Don’t Overlook Proper Drying Times
Mylar doesn’t absorb ink like paper, so drying times can be significantly longer. Ensure your printing process allows enough time for inks to fully dry and set before handling or shipping. Rushing this process can lead to smudged designs and wasted resources.
2. Don’t Forget the Seams
When designing your printed Mylar bag, remember that seams and folds can distort your artwork. Avoid placing critical design elements like logos or key text across seams where they might be folded, creased, or obscured.
3. Don’t Use Harsh Chemicals
While Mylar is chemically resistant, using harsh cleaning chemicals on printed areas can damage the ink. If your Mylar bags need to be cleaned before use, opt for mild cleaning solutions and ensure they’re fully dry before filling and sealing.
4. Don’t Neglect the Prototype Stage
Always create a prototype before going into full production. This allows you to see how your design translates onto Mylar and make necessary adjustments. It’s much cheaper to tweak a prototype than to redo an entire batch after discovering design flaws.
Conclusion
Mylar bag printing offers a fantastic opportunity to showcase your brand in vibrant, durable, and versatile ways. By adhering to these dos and don’ts, you can maximize the effectiveness of your designs and ensure your products stand out in the marketplace. Remember, the key to stunning Mylar printing lies in meticulous planning, high-quality materials, and attention to detail.
